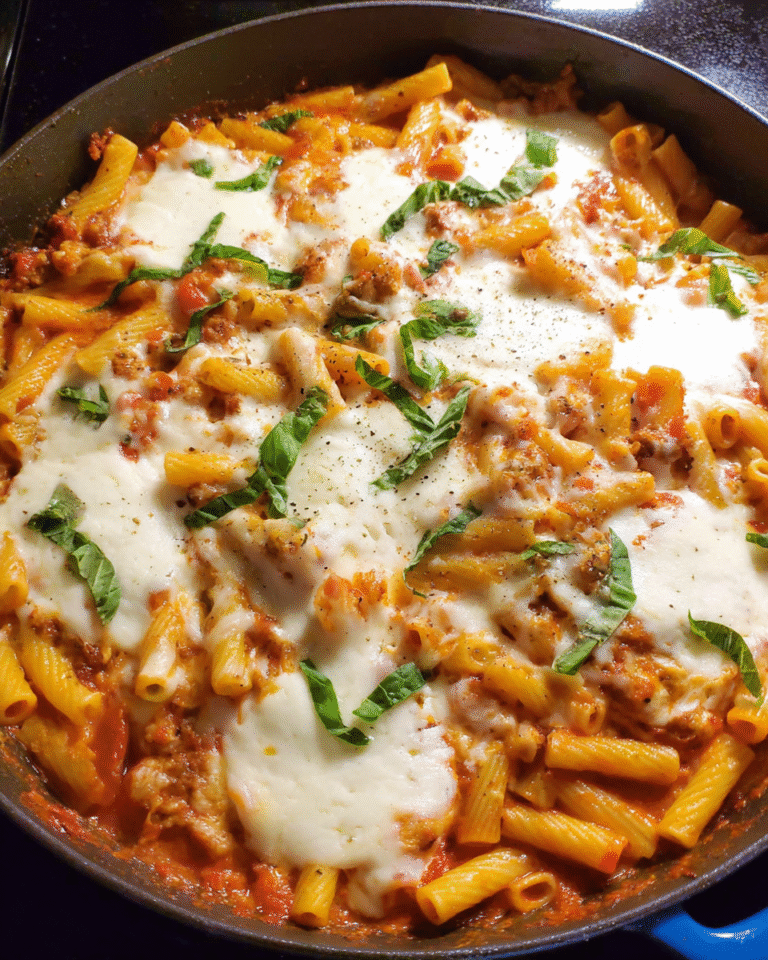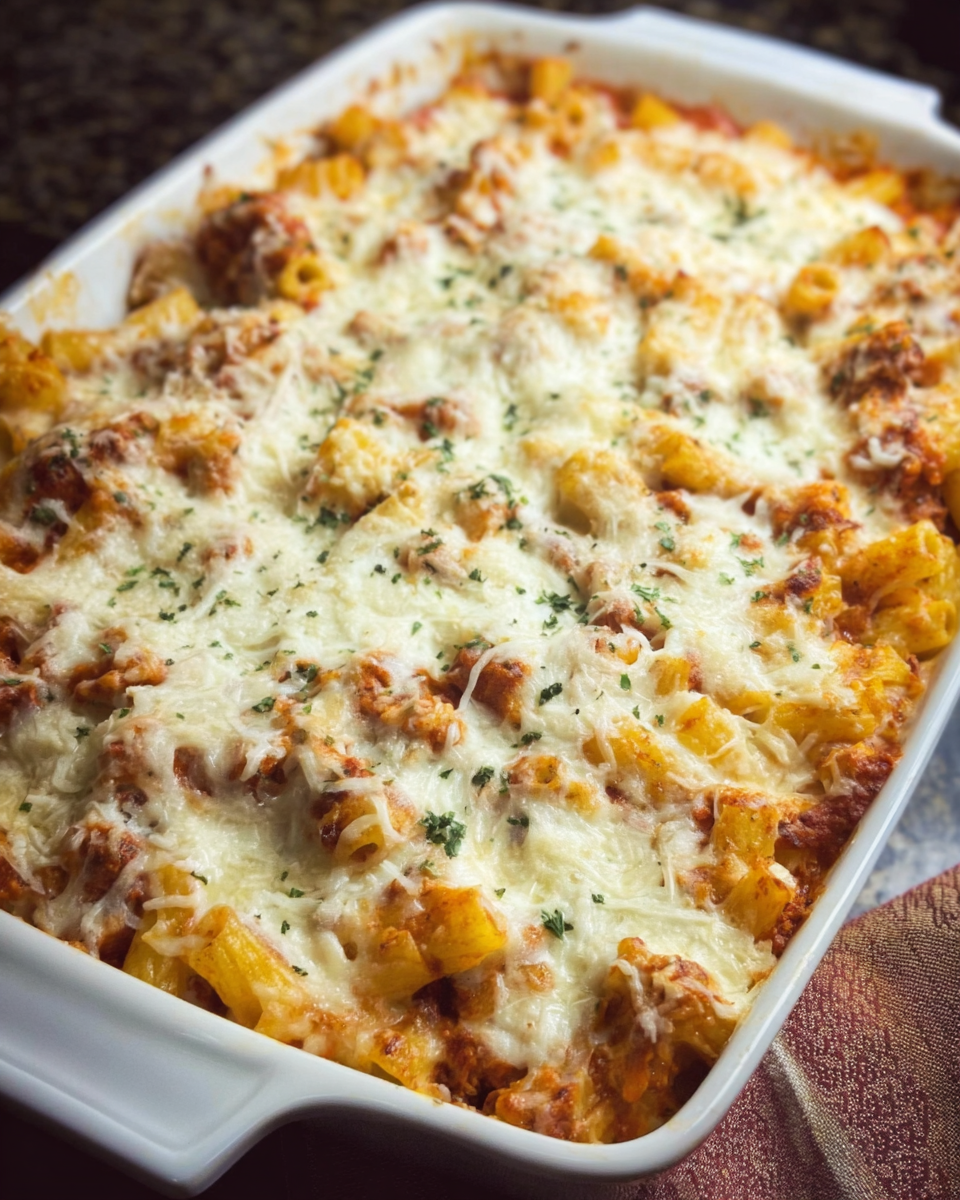
Make-Ahead Baked Ziti That’s Creamy, Cheesy, and Crowd-Pleasing
When it comes to comfort food that doubles as a crowd-pleaser, few dishes rival the magic of a well-made baked ziti. And when you can prep it in advance, the deal only gets sweeter. This Make-Ahead Baked Ziti recipe is the kind of dish that wins over picky kids, impresses dinner guests, and solves weeknight dinner stress—all in one bubbling, cheesy casserole. Whether you’re planning a holiday meal or just want to stock the freezer for later, this version makes the process effortless without sacrificing flavor.
There’s something uniquely satisfying about ziti baked to golden perfection, oozing with mozzarella and rich tomato sauce, layered just right so every bite hits the spot. The real beauty? You can make the entire dish ahead of time, stash it in the fridge or freezer, and bake it when you’re ready—no last-minute chaos, just cheesy, comforting perfection.
Print
Make-Ahead Baked Ziti That’s Creamy, Cheesy, and Crowd-Pleasing
- Total Time: 45 minutes
- Yield: 10 servings
- Diet: Vegetarian
Description
This Make-Ahead Baked Ziti is the ultimate crowd-pleaser—cheesy, rich, and ready when you are. Perfect for parties, weeknight dinners, or freezer meal prep, it’s loaded with ricotta, mozzarella, Parmesan, and a generous helping of tomato sauce for that classic Italian-American comfort flavor.
Ingredients
1 lb ziti pasta
6 cups shredded mozzarella cheese, divided
15 oz ricotta cheese
1/2 cup grated Parmesan cheese
2 large eggs
3/4 cup chopped flat-leaf parsley, divided
1/2 teaspoon salt
1/4 teaspoon ground black pepper
8 cups tomato sauce (plain or with your choice of meat substitute)
Instructions
1. Preheat your oven to 375°F.
2. Cook the ziti according to the package directions. Drain and set aside.
3. In a large mixing bowl, combine 2 cups of the mozzarella cheese with the ricotta, Parmesan, eggs, 1/2 cup of the parsley, salt, and pepper. Mix until smooth.
4. Add the cooked ziti to the cheese mixture and stir to coat evenly. Mix in 2 cups of the tomato sauce.
5. In a large baking dish, spread 2 cups of tomato sauce across the bottom.
6. Layer half of the ziti mixture over the sauce, then top with another 2 cups of sauce and 2 cups of mozzarella cheese.
7. Add the remaining ziti mixture, followed by the rest of the sauce and the remaining mozzarella cheese.
8. Bake uncovered for 30 minutes, or until bubbly and heated through.
9. Let rest for 5 minutes, then sprinkle with the remaining parsley before serving.
Notes
To freeze, assemble the entire dish, cover tightly with foil, and freeze for up to 2 months. Thaw overnight in the fridge before baking. For a crispier top, remove foil for the final 10 minutes of baking.
- Prep Time: 15 minutes
- Cook Time: 30 minutes
- Category: One-Pot & Easy Meals
- Method: Baked
- Cuisine: American
The Secret to Perfect Make-Ahead Baked Ziti Every Time
Choosing the Right Pasta Shape and Cook Time
Ziti may seem like a straightforward pasta, but your choice of noodle and how long you cook it can make or break the dish. Look for smooth or slightly ridged ziti that holds onto the sauce but doesn’t fall apart under heat. Cook it just until al dente—it will continue to cook as it bakes, and overdone pasta can turn mushy fast in a make-ahead setting. This subtle adjustment helps the ziti hold its structure and absorb flavor without becoming soggy.
How to Keep Ziti Moist (Not Mushy or Dry)
The biggest mistake in make-ahead baked pasta dishes? Dry noodles or watery, overcooked messes. The key is incorporating enough sauce to prevent drying out while allowing the cheese mixture to cling to the pasta. In this recipe, the ziti is coated with a rich ricotta blend and sauced in layers, ensuring moisture and flavor from top to bottom. That balance—between saucy and structured—is what gives baked ziti its irresistible texture.
Why Layering Matters in Make-Ahead Baked Ziti
Layering isn’t just for aesthetics—it’s essential to getting an even melt, perfect cheese pull, and balanced bite. When assembling, resist the urge to mix everything at once. This baked ziti is carefully built in stages: sauce, pasta mixture, more sauce, cheese, and repeat. It’s a method that locks in flavor and gives that crave-worthy top layer of golden, bubbly mozzarella. Think of it as lasagna’s simpler, less fussy cousin—but just as satisfying.
Ingredients That Elevate Your Make-Ahead Baked Ziti
The Best Cheeses for Texture and Flavor
Mozzarella is the star of any baked ziti, but the supporting cast matters just as much. Here, we use three cheeses—mozzarella for melt, ricotta for creaminess, and Parmesan for depth. Shredding your own mozzarella makes a difference in melt and flavor, avoiding the anti-caking agents in pre-shredded varieties. And when it comes to ricotta, whole milk delivers the richest texture, binding the pasta beautifully without breaking apart during baking.
Fresh Herbs vs Dried in Ziti Recipes
Parsley is a quiet hero in this dish. Using chopped flat-leaf parsley brings a freshness that cuts through the richness of the cheeses. While dried herbs can work in a pinch, they don’t offer the same brightness as fresh. You’ll stir parsley into the cheese mixture and sprinkle more on top before serving, giving every bite a subtle herby lift that complements rather than competes with the tomato base.
Sauce Selection: Plain Tomato vs Meat Sauce
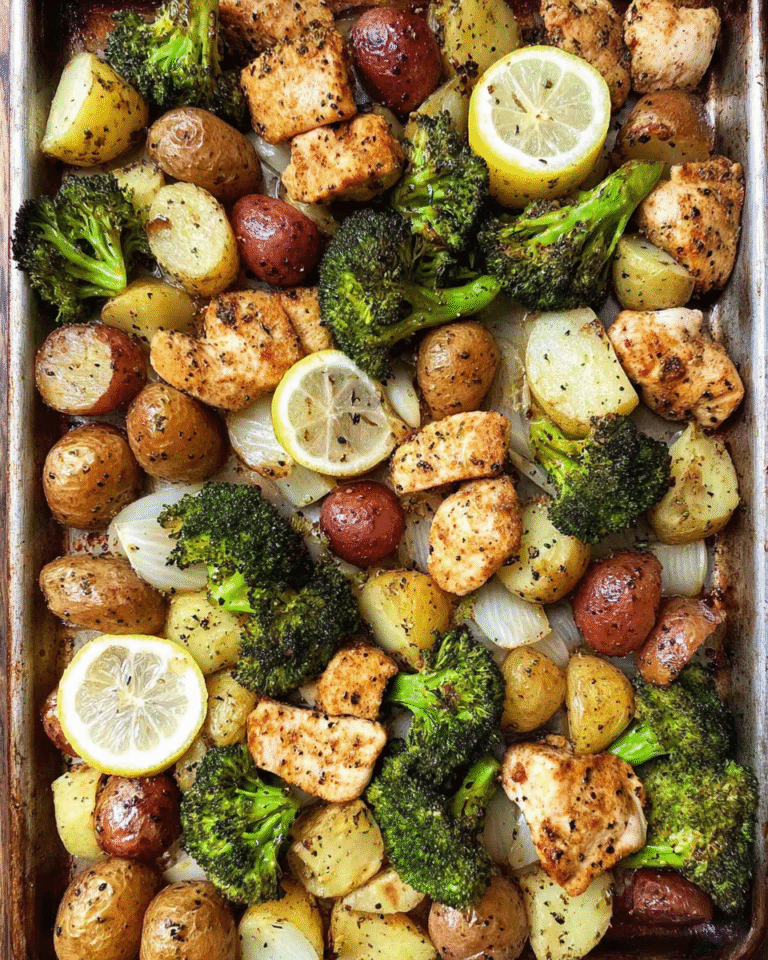
This baked ziti is vegetarian, but that doesn’t mean it lacks depth. Using a high-quality tomato sauce—whether store-bought or homemade—makes all the difference. You can easily adapt it with your favorite meat alternative or keep it simple. If you’re looking for another hearty, veggie-forward dish, try these Chicken and Spinach Stuffed Shells for a flavorful twist on baked pasta.
How to Assemble and Bake Make-Ahead Baked Ziti
Mixing Pasta and Cheese for Even Coating
The cheese blend isn’t just layered—it’s mixed directly with the pasta to coat every piece. This guarantees even distribution and prevents clumps or dry pockets. Stir in some tomato sauce here too, so the pasta starts absorbing flavor before it even hits the dish. That early contact between sauce and noodle is a little trick that leads to a much more cohesive final bake.
Layering Technique for Maximum Melt and Flavor
Start with a generous base of sauce in the baking dish to prevent sticking. Then follow the layer flow: half of the cheesy pasta, sauce, mozzarella, repeat. Each layer is essential for flavor, but it also affects the texture. The middle layer keeps everything moist, while the top layer gives you that coveted golden, bubbling crust that makes baked ziti irresistible.
Timing the Bake: Getting That Golden Top
Bake uncovered so the top cheese layer browns beautifully. Thirty minutes at 375°F is the sweet spot—hot enough to melt and bubble everything, but not so long that it dries out. Letting it rest for five minutes after baking is key. It sets the layers and makes it easier to serve without falling apart. For a similar crisp-yet-creamy vibe, you’ll also love this Crispy Parmesan Baked Chicken Milanese and Veggies.
Smart Prep Tips for Make-Ahead Baked Ziti Success
Making Ziti Ahead Without Sacrificing Texture
The genius of make-ahead baked ziti is that it can be fully assembled and refrigerated the night before. Cover tightly with foil or wrap to avoid drying out, then bake as usual. If you’re cooking straight from the fridge, add an extra 10 minutes of bake time to ensure it’s heated through. The key is to avoid overcooking the pasta before baking so it doesn’t get too soft later.
How to Store Ziti Before Baking
Once assembled, baked ziti can be stored in the refrigerator for up to 24 hours. Use a deep baking dish with a tight-fitting lid or a double layer of foil. Label and date it if you’re preparing multiple dishes ahead. This trick saves tons of stress when hosting or feeding a family on a busy weeknight.
Freezing and Reheating Instructions That Work
This dish freezes like a dream. Assemble it, cover tightly, and freeze for up to 2 months. When ready to bake, thaw overnight in the fridge and bake as directed. For an extra crispy top, uncover during the last 10 minutes. It’s the ultimate freezer-friendly meal, making it easy to batch cook without losing quality.
Serving Make-Ahead Baked Ziti for Guests and Gatherings
Make-Ahead Baked Ziti for a Crowd Without Stress
Hosting a large group? This dish scales up beautifully. One batch serves ten, but you can easily double it in two pans. Serve with a simple green salad and garlic bread and you’ve got a dinner-party-worthy spread that took barely any effort on the day of. It’s no wonder people turn to make-ahead baked ziti when feeding a crowd—it’s hearty, flexible, and always a hit.
What to Serve With Baked Ziti (Salads, Breads, Sides)
Pair your ziti with crunchy romaine dressed lightly with lemon vinaigrette, or go classic with Caesar salad. Garlic knots, crusty bread, or even roasted vegetables round out the meal. The simplicity of the ziti makes it the perfect centerpiece—everything else is just the finishing touch.
Storing Leftovers the Smart Way
Got leftovers? Store them in individual portions for easy reheating. Microwave works fine for small servings, but if you want that fresh-baked texture again, reheat in the oven at 350°F for 10–15 minutes. The dish stays good in the fridge for 3–4 days, and the flavor only deepens overnight.
Variations on Classic Make-Ahead Baked Ziti
Adding Meat or Veggies Without Overloading
You can easily add browned sausage, ground beef, or sautéed vegetables like mushrooms or zucchini to this baked ziti. Just fold them into the cheese mixture or layer them between pasta sections. Avoid overfilling though—too many extras can make the dish soggy or unevenly baked.
Turning This Into a Low-Carb or Gluten-Free Version
For a gluten-free take, use GF pasta (but be sure to undercook it slightly). To reduce carbs, try using spiralized zucchini or a cauliflower base. You’ll need to adjust sauce and moisture slightly, but the flavor still shines through, especially when the cheese does the heavy lifting.
Make-Ahead Baked Ziti for Weeknight Meal Plans
This dish fits beautifully into a Sunday meal prep plan. Make one batch for dinner, portion the rest for lunches or freezer storage. It reheats better than most pasta dishes and stays creamy without needing extra sauce. When life gets hectic, having make-ahead baked ziti in the fridge is the ultimate dinner insurance.

Frequently Asked Questions About Make-Ahead Baked Ziti
What makes a great baked ziti recipe?
It’s all about balance—perfectly cooked pasta, rich but not heavy cheese, enough sauce to keep it moist, and that golden, bubbling top layer. The layering technique and fresh herbs in this version really set it apart from others.
How do you make make-ahead baked ziti for a crowd?
Double the batch, use large disposable pans for easy cleanup, and refrigerate or freeze ahead. This baked ziti recipe serves ten, making it ideal for group meals with minimal stress on the day-of.
Can I freeze baked ziti before baking?
Yes—assemble it fully, cover well, and freeze up to 2 months. Thaw overnight in the fridge, then bake as directed. It reheats beautifully and tastes just as good as fresh.
How long does make-ahead ziti last in the fridge?
It will keep for 3–4 days in an airtight container. For best results, reheat in the oven to restore the crispy edges and melted cheese texture.
Conclusion: Why Make-Ahead Baked Ziti Deserves a Spot in Your Meal Rotation
Whether you’re hosting a dinner party, meal prepping for the week, or just need a dependable comfort dish, make-ahead baked ziti delivers every single time. It’s rich, hearty, and satisfying without being fussy—and it gives you the freedom to enjoy your evening instead of standing over the stove. With a few pantry staples, some cheese, and a little planning, you’ve got a dish that works as hard as you do.
For more successful recipes, you can visit our Facebook page or our Pinterest account